Subject: How to create a custom object and page using Oracle Fusion Application Composer.
Navigate to your oracle fusion application.
For Application composer access we need below pre-requisite access.
1) Pre-requisite roles
- For Application Composer Access
ORA_ASM_APPLICATION_IMPLEMENTATION_CONSULTANT_JOB
- For Custom Objects Access
ORA_CRM_EXTN_ROLE ,
ORA_HZ_RESOURCE_ABSTRACT
2) Need to create Sandbox and required tools need to include in the sandbox
Click on left-hand side top navigator button > Configuration > SandBox
Click on SandBox.
Click on Create SandBox Button.
I have created an APP_COMP_TEST_2 SandBox.
I have assigned below highlighted tools for that specific sandbox.
Once all required tools assigned we need to enable sandbox.
Once SandBox enabled instance top side yellow highlighted popup box will appear. Which will show currently enabled SandBox details.
Now navigate to Left-Hand side
Navigator > Configuration > Application Composer
This is an Application Composer Main Screen.
If we don't enable sandbox than we can not able to access Application Composer.
You can see the left-hand side panel showing all the available functionality of Application Composer.
Application: CRM / ERP and SCM Cloud
For creating a custom object, click on '+' icon next to the Custom Object.
Enter all the required field for a new custom object.
Please make sure Custom Object name can not be changed once it's created.
Also at the time of creating a new custom object we need to assign at least 1 record name (Column Name) which is mandatory.
Once all required field entered click on the 'OK' button.
The system will take 2-3 Min for creating a Custom Object.
Once object created, System will automatically take API name Custom Object Name with '_c'
API Name: PO_REFERENCE_c
If you check left-hand side panel for that custom object, It's having default enabled functionality.
1) Fields
2) Pages
3) Actions and Links
4) Security
5) Server Scripts.
Click on "Field" from the left-hand side panel.
For creating new custom fields, click on Action > Create.
User has to fill up all the required details and data type for the new fields.
Here we have created 'Ref1' field.
Once all the required details filled up, click on Save and Close.
The same way we have created 'Ref2' field.
The same way we have created 'Ref3' field.
We can see all the custom fields which we have created.
Here we can see 2 tabs Customs & Standards
Custom - we are created new custom fields.
Standards - Oracle provided standard column like WHO column is available.
Once all the custom field created, Navigate to 'Page' tab from the left-hand side of the panel.
Oracle has provided standard functionality to Create Defult pages.
Click on 'Create Default Pages'
The system will take 1 -2 min for created default pages.
Oracle will automatically create below highlighted 4 different Layouts.
1) Landing Page Layouts.
2) Creation Page Layouts.
3) Details Page Layouts.
4) Reusable Region.
Navigate to "Landing Page Layout"
Click on "Default Custom Layout"
Click on Edit Button, next to the summary table.
We can see all the available fields on the screen.
Based on Business needs we can include field from Available field to the Selected Fields window.
Once all the required fields selected, Click on 'Save and Close'
Click on Done.
We can see the summary table updated field are visible.
The same way we can change the Creation Page Layout as per the business need.
Click on Default Custom Layout under Creation Page Layout window.
Click on Edit Button.
Select the required fields from the Available fields list.
Click on Save and Close.
Click on Done.
The same way we can change the Details Page Layout.
Click on
Default Custom Layout under the
Details Page Layout Tab.
Click on Edit Button.
Select the required fields from the available field list.
Click on Save and Close.
Click on Done.
Once all the changes are done at the page level.
Click on Newly Defieded Custom Object from the Left-Hand Side panel.
We can change the Custom Object Icon From the main Screen as highlighted in the below screen.
Below is the list of the default oracle provided Custom Objects Icon List.
As you can see we have selected "Journal Icon"
This Icon is nothing but your custom Application Icon when you navigate from the Home screen you can find it easily.
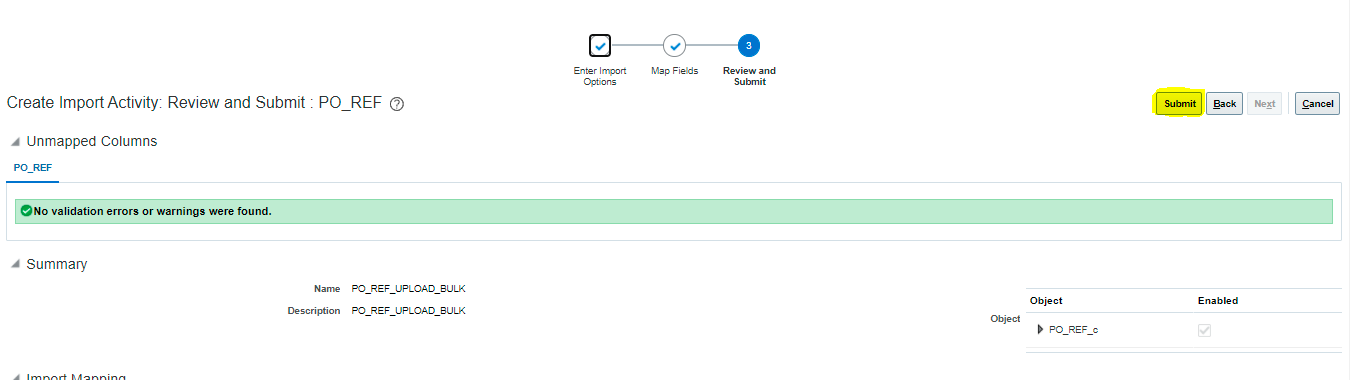
Once all the necessary field and page details are defined, we need to test the custom object as a frontend application user.
You have to Sign Out from the current user and Login again for the same user.
Navigate to Home > Others > PO Reference
We can see that Landing page layout as we have set all the fields at a time of designed a page.
Click on Create Button.
We can see the field on the creation screen which we have enabled at the time of designed Creation page.
Enter all fields > Click on Save and Close.
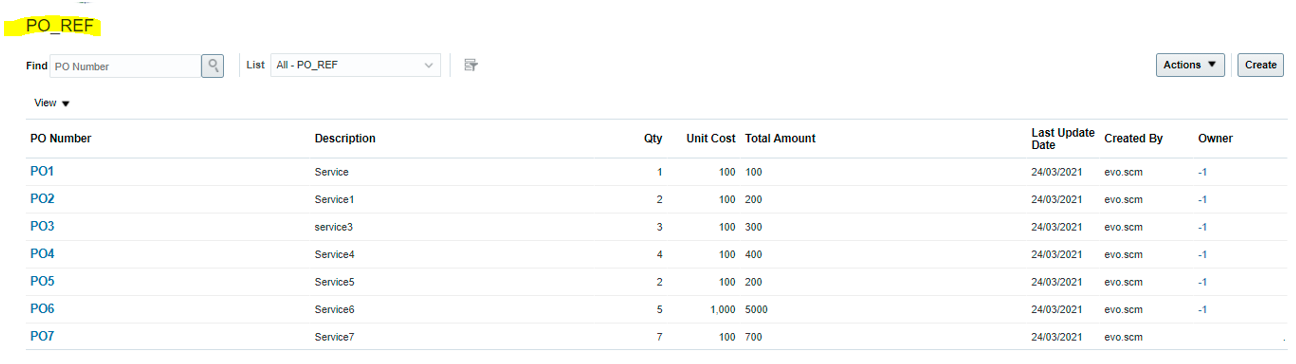
We can see the Landing page screen and all the record information.
Oracle has provided default functionality to export recorded data.
Click on Action > Export
It will generate Excel Output.
We can see all the record information in the exported excel output.
Hereby,
We learnt how to create custom Objects and Pages by using Oracle Application Composer Functionality.