Purpose: In this session, we learn how to register custom BIP report as ESS Schedule Process.
Step1: Navigate to Fusion Application > Go to Setting and Actions > Setup and Maintenance

Step2: Select Task > Click on Search

Step3: Search panel enter Manage%Enter%Schedual%Job > Search > Select "Manage Enterprise Scheduler Job Definitions and Job Sets for Financial, Supply Chain Management, and Related Applications"

Step4: Click on "+" button

Step5: Select Manage Job Definitions tab >
- Enter Display Name = 'AP Invoice Report'
- Name = 'AP Invoice Report'
- Path = /oracle/apps/ess/custom/
- Description = 'AP Invoice Report'
- Job Application Name = FscmEss
- Job Type = 'BIPJobType'
- Report Id= /Custom/Demo/APInvoiceReport.xdo
- Allow Multiple Pending Submissions = False

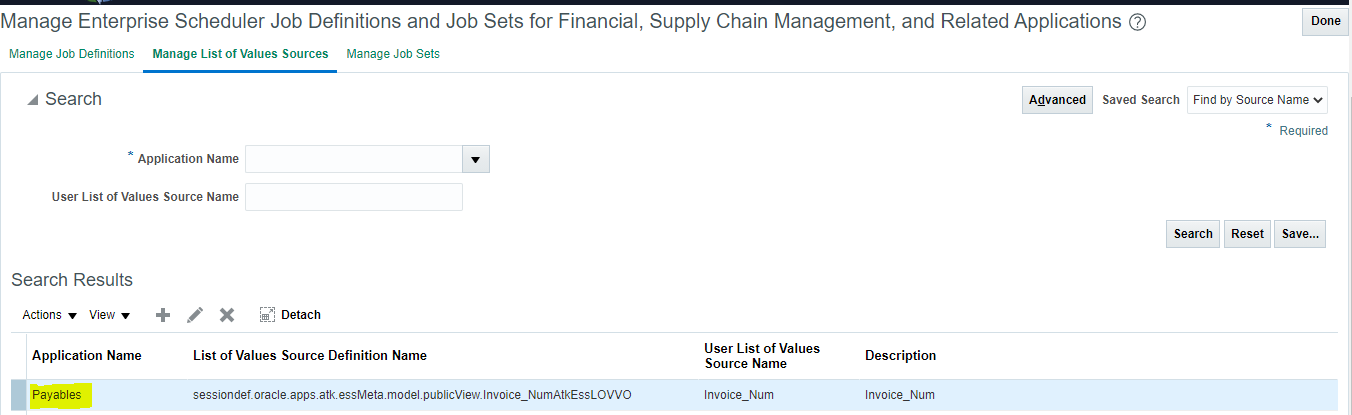
Step6: Navigate to Manage List of Values Sources tab > Click on '+' button
- Application = Payable
- User List of value source name = Invoice_Num
- Description = Invoice_Num
- LOV Type = User Defined
- SQL Query = Select your LOV query which you defined in Data Model LOV
- Click on Save and Close.

Step7: LOV created
Step8: Navigate to Manage Job Definitions tab > Select bottom side 'AP Invoice Report: Parameter tab' > Click on "+" button

Step9: Enter Parameter details and assign LOV as per attached screenshots > Click on Save and Close

Step10: Now Close Save and Close Job Definition.

Step11: You can see now the ESS Job Created Successfully.

Step12: Navigate to Tools > Click on Schedule Process.
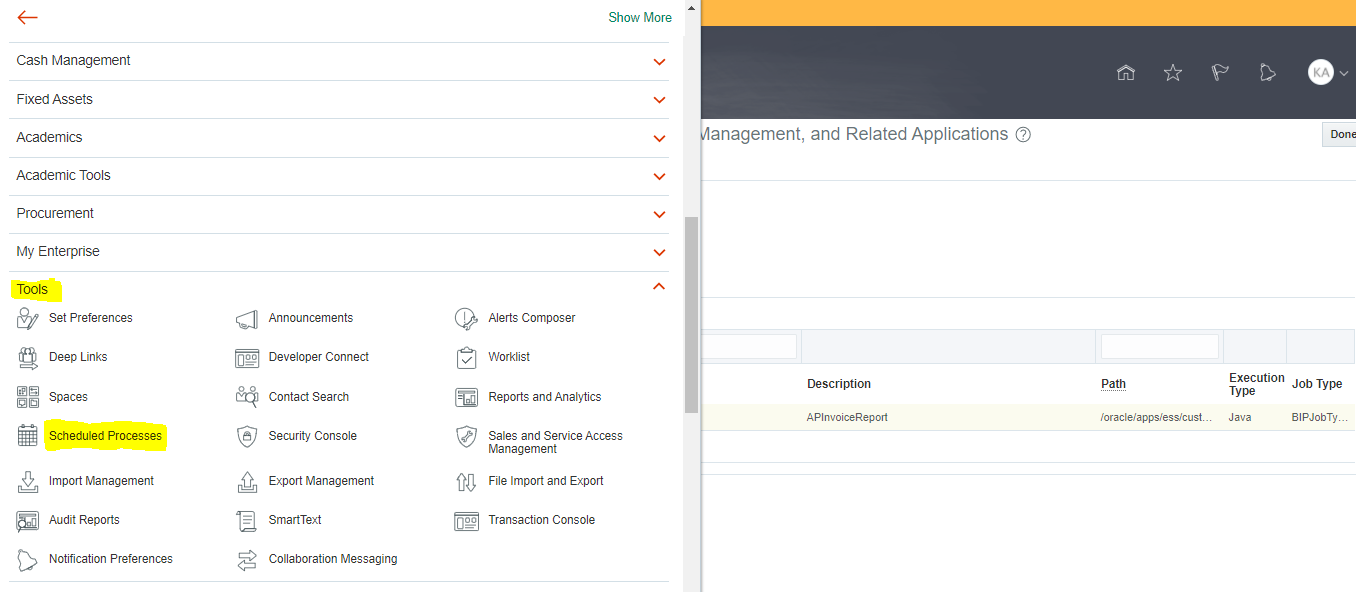
Step13: Search AP%Invoice%Report
- Now we can able to see the registered report.

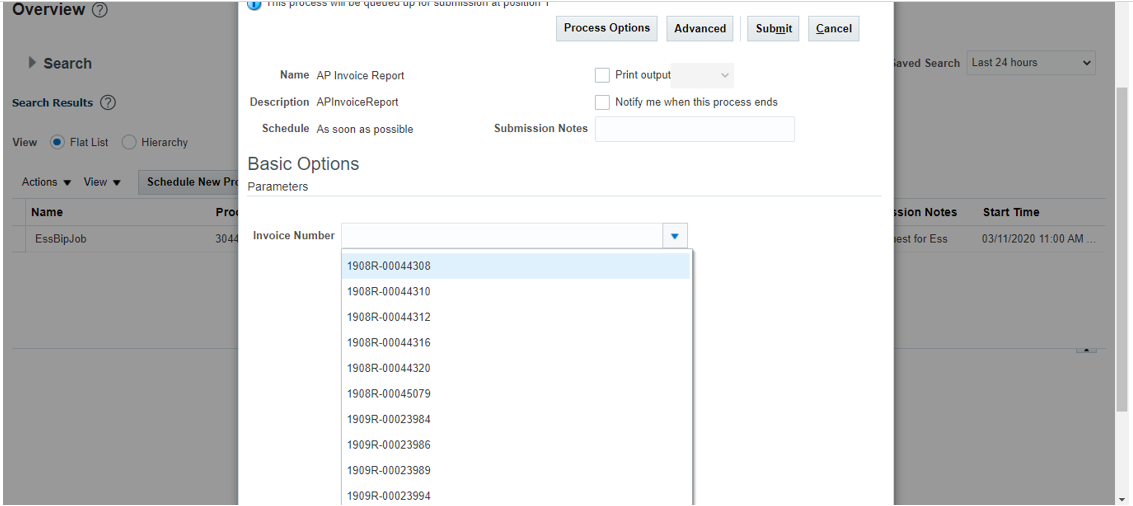
Step14: Select Parameter & Submit
Step15: You can see the ESS job Status is Succeeded.


No comments:
Post a Comment
Note: only a member of this blog may post a comment.