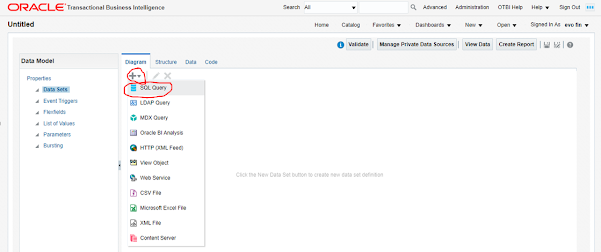
Step1: Creating a Data Model
-
Navigate to > BI Catalog
> Click on Left-hand side top chart icon > Select Data Model

-
Click on ‘+’ icon > SQL Query
-
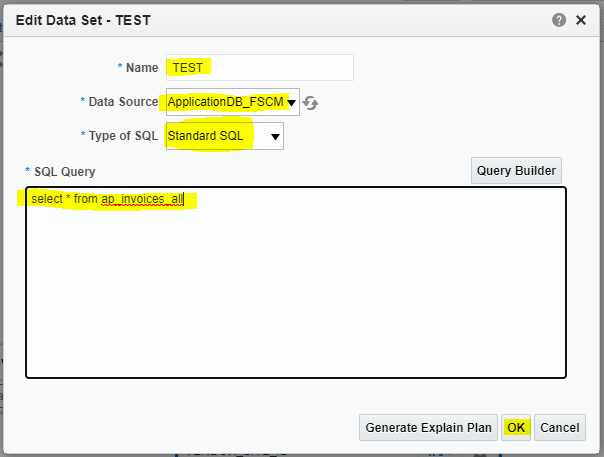
Enter Name = Data Set Name (i.e
TEST)
-
Select Date Source = ApplicationDB_FSCM
-
Select Type of SQL = Standard SQL

-
Enter SQL Query.
-
For demo purpose, I have added ‘AP Invoice query’ in data set query.
-
Click on OK
-
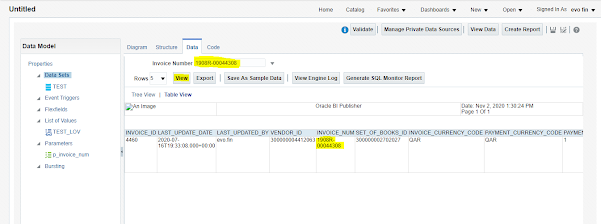
Navigate to : Data > Click on
View > Select Tree view (Default)
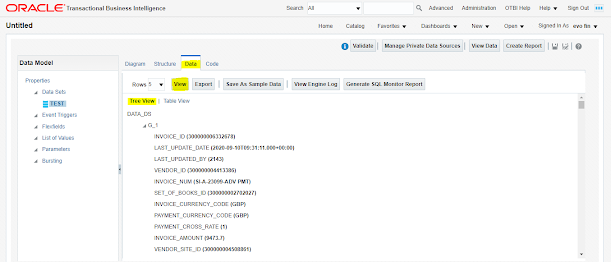
-
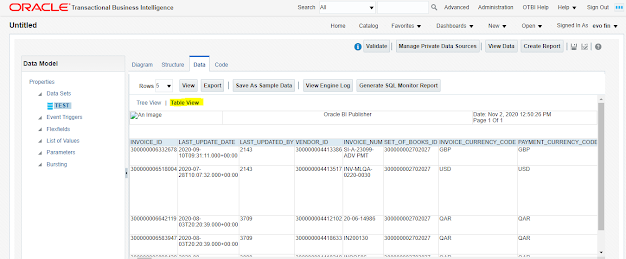
We can see the data in
table format as well by selecting Table view
-
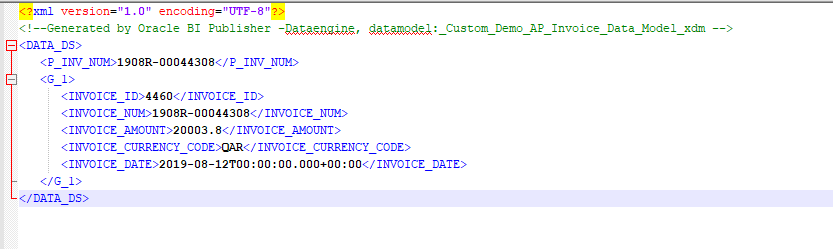
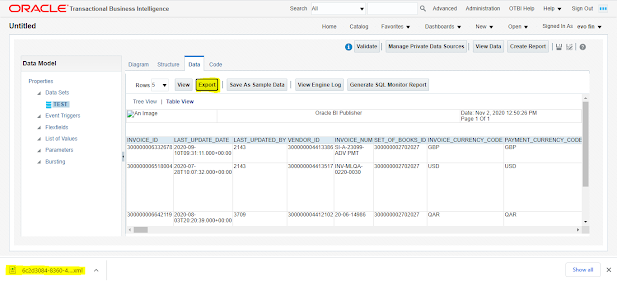
We can export data by click
on the Export button (Data will be exported In XML format only)
-
We can save the view data
as sample data by click on Save As
Sample Data button. It will help you to design an iterative layout.
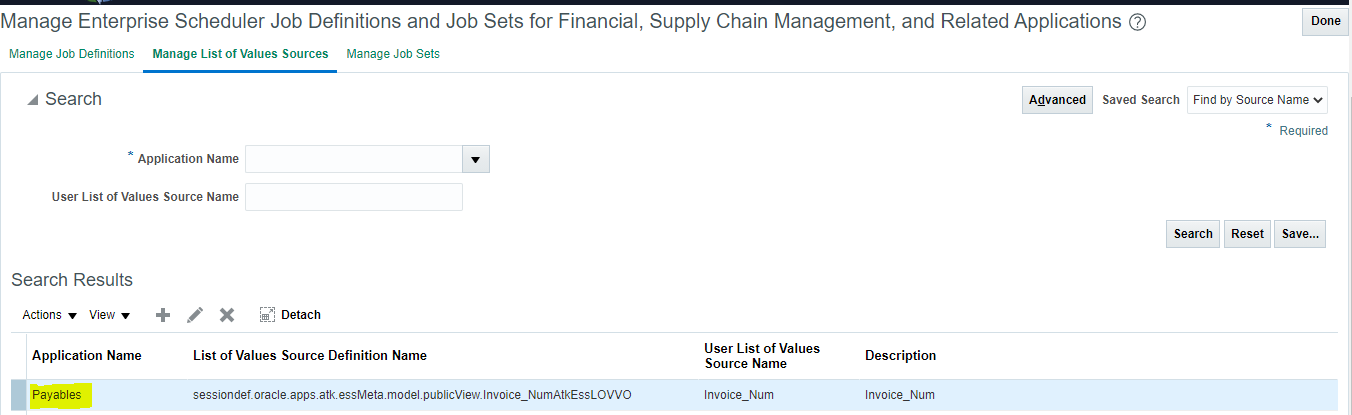
Step2: Create LOV
-
For Create LOV:
-
Navigate to List of Value
Tab > Click on ‘+’ icon
-
Enter Name, Select Type as
‘SQL Query’, Select Data Source as ‘ApplicationDB_FSCM’
-
Enter the SQL query based on
what you need to prepare LOV.
-
We have added invoice
number as LOV so we added Invoice Number query.
-
Save the data.

Step3: Create Parameter
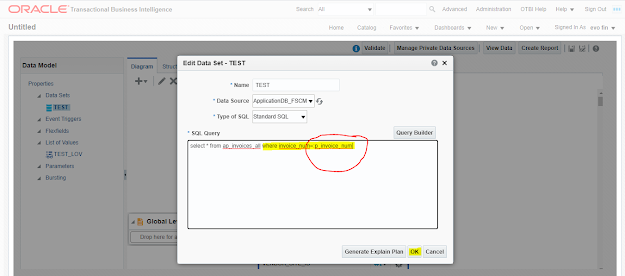
-
For creating parameter we
added bind invoice number variable (i.e p_invoice_number) in where clause of
dataset SQL query.
-
Click on OK
-
Once you click on OK.
-
A System popup message will
ask you to add newly added bind variable as a parameter.
-
Click on OK.

-
Once bind variable selected
for creating as a parameter. The system will automatically create a parameter in the parameter tab.
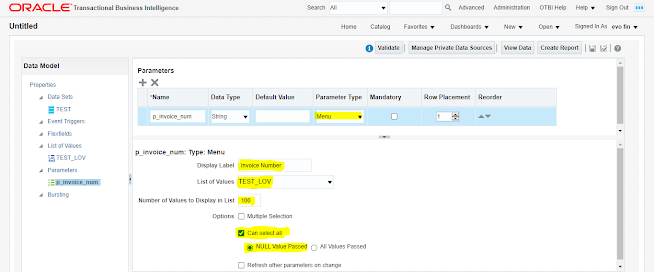
Step4: Assign Newly Created LOV to Parameter
-
Once Parameter and LOV
created we need to assign LOV in Parameter for run-time selection on value.
-
Select Parameter Type: Menu
-
Enter Display Label: Which
we what to show the parameter label at the time of report execution.
-
List of Values: Select
newly created LOV from the list.
-
Number of value to Display
in List: Default value is 100
-
Can Select All: By Default
Selected (If user not select value from LOV than it will pass all value or Null
value as per radio button selection)
-
Null Value passed: By
Default Selected Radio Button.
-
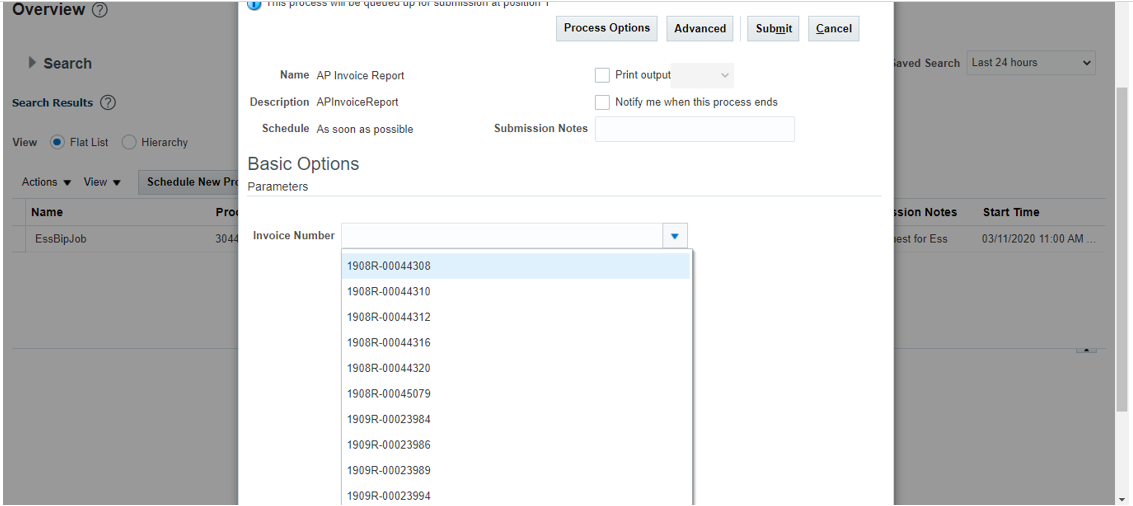
Once Parameter level LOv
assigned. Navigate to Data tab.
-
Now we can able to see the
Invoice Number parameter and attached LOV values.

-
Once you pass a specific parameter
value and view the data, the system will fetch only specific data with respect to the passed parameter value.