Thursday 27 May 2021

Oracle EBS - Order Management Sales Order Cancelled Line Return Reason SQL Query

Requirement: We need to fetch cancelled sale order line return reason query.

Navigation: Order Management Responsibility > Sales Order > Action > Additional Information > Quantity Hitrory.


SQL Query:


 (select LISTAGG( FLV.MEANING, ',') WITHIN GROUP (ORDER BY  FLV.MEANING)

        from 

        OE_REASONS OER,

        fnd_lookup_values_vl FLV

        where 

        FLV.LOOKUP_TYPE=OER.REASON_TYPE

        AND FLV.LOOKUP_CODE=OER.REASON_CODE

        AND OER.HEADER_ID=OOHA.HEADER_ID  --Need to pass order header Id

        AND OER.ENTITY_ID=OOLA.LINE_ID        -- Need to pass order line Id

) return_reason_code

Wednesday 21 April 2021

Oracle Fusion: How to Migrate Bulk Customer Using FBDI Template


Oracle Fusion:

How to Migrate Bulk Customer Using FBDI Template?


Requirement:

We need to create customer and contact using Oracle Fusion FBDI template.


Solution:

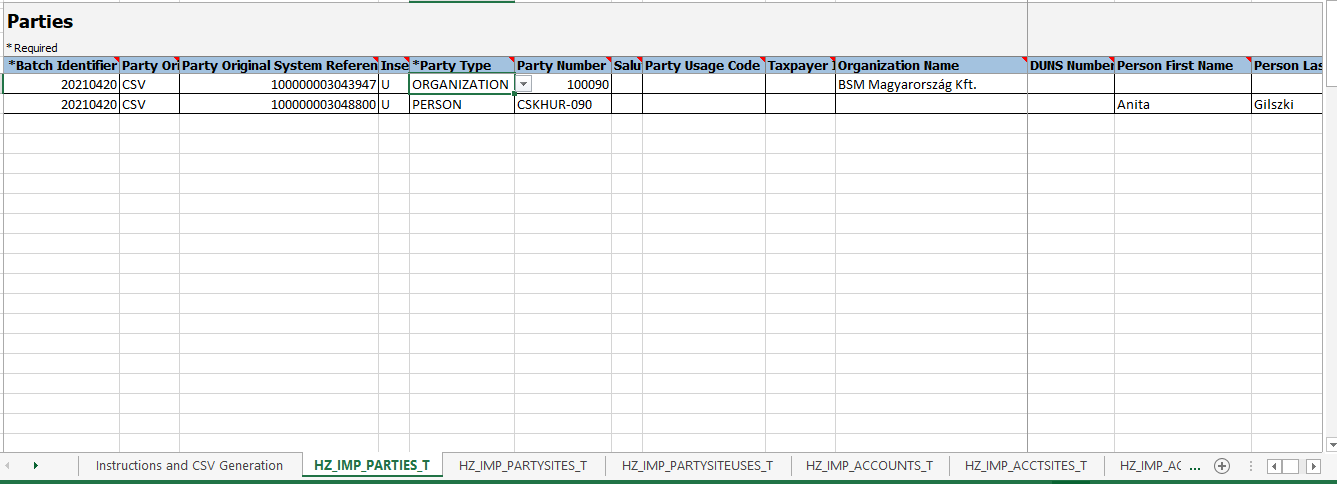
Step1: First required to prepare data as per the FBDI template format in the below sheets.

- FBDI template download link: Customer FBDI Template


Customer Sheets:

-          HZ_IMP_PARTIES_T

-          HZ_IMP_PARTYSITES_T

-          HZ_IMP_PARTYSITEUSES_T

-          HZ_IMP_ACCOUNTS_T

-          HZ_IMP_ACCTSITES_T

-          HZ_IMP_ACCTSITEUSES_T

-          RA_CUSTOMER_PROFILES_INT_ALL

Contacts Sheet:

-          HZ_IMP_ACCTCONTACTS_T

-          HZ_IMP_CONTACTPTS_T

-          HZ_IMP_CONTACTROLES

-          HZ_IMP_CONTACTS_T

-          HZ_IMP_RELSHIPS_T

-          HZ_IMP_ROLERESP


Step2: After data loaded in the template file generated .CSV file using FBDI template


Step3: Once .CSV file generated we need to schedule the request. “Load Interface File for Import


                Import Process: Import Trading Community Data in Bulk

                Date File: Assign .CSV zip file which is generated and saved in the local system.


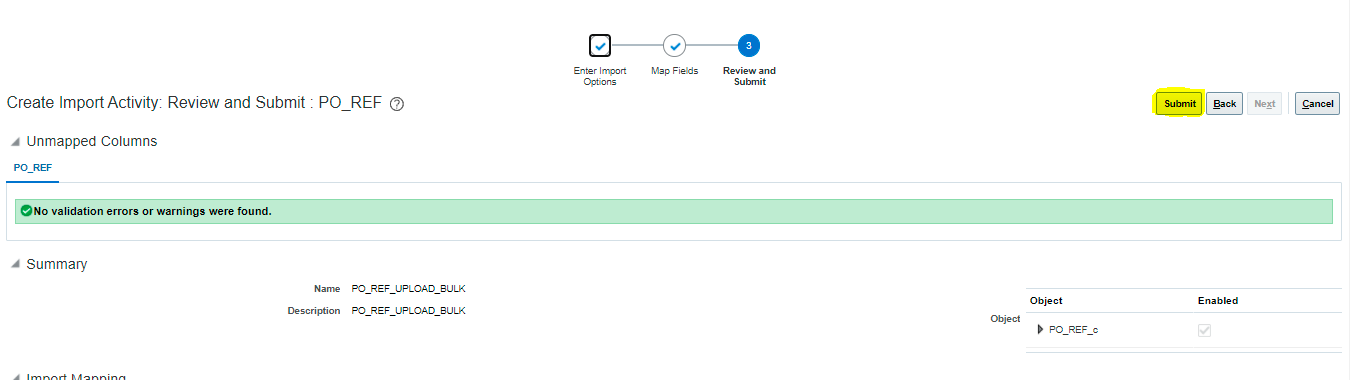
Step4: Enter the required details and submit the request. Wait for the completion of the request.

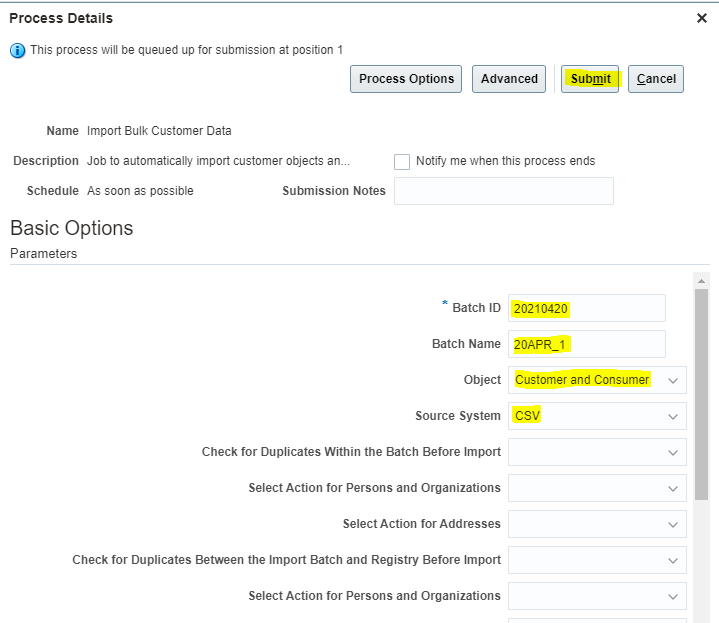
Step5: After the Load Interface request complete we need to submit “Import Bulk Customer Data


    - Batch Id: 20210420

                - Batch Name: 20APR_1

                - Object: Customer and Consumer

                - Source System: CSV


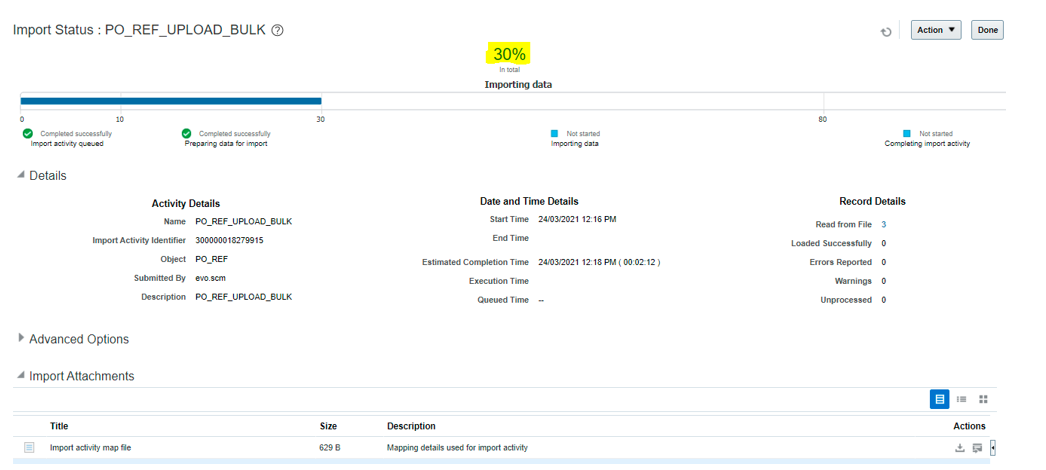
Step6: Submit the request and wait till the request completed successfully.

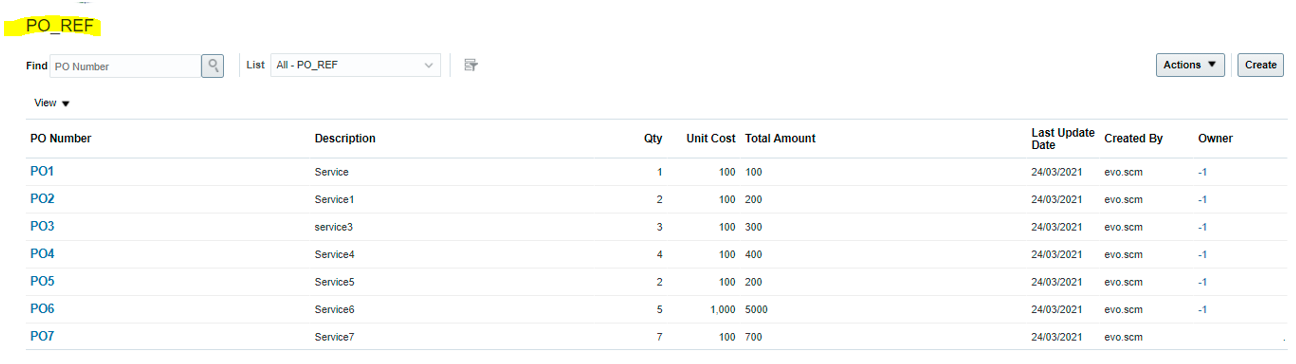
Step7: We can Import Data.

                Navigation: Home > Receivables > Billing Tab > Task > Manage Data Import


Step8: We can see our Batch Name and Batch ID which we processed.


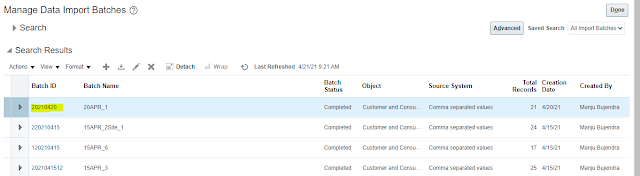
Step9: We can see the record and process status from this screen. If it’s completed without error. Customer created successfully.


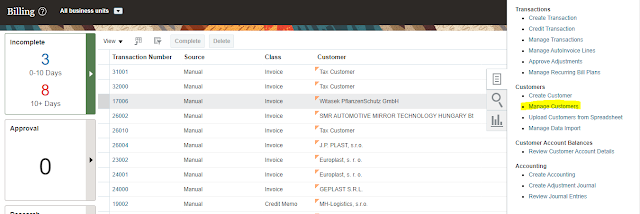
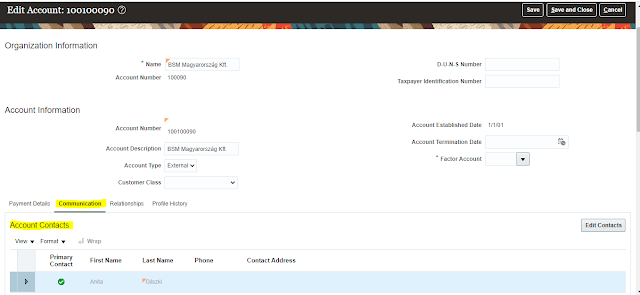
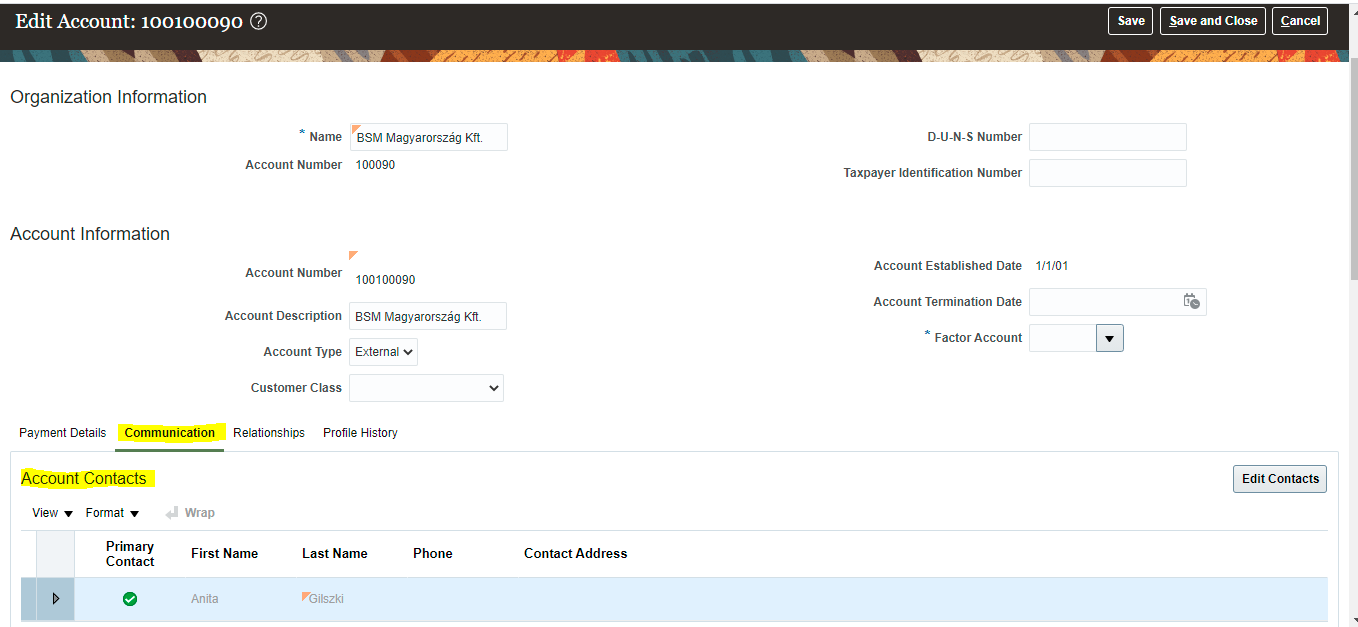
Step10: We can cross verify the customer in Fusion AR from the customer master screen. We can search customer with Organization Name. We can found a customer with the same name. W can also found that contact also assigned to a customer in the Account - communication tab.

Navigation: Home > Receivables > Billing > Manage Customers.


Wednesday 24 March 2021

Oracle Fusion Application Composer: How to upload Bulk data in Custom Object


Oracle Fusion

Application Composer:

How to upload Bulk data in Custom Object


Requirement: Need to upload bulk data in the custom object.

 (To Learn More About Application Composer Visit Oracle Fusion: Application Composer)

Step1:

Below is the custom object home page. I need to upload bulk data in this object.


Step2:

Click on Navigator > Tools > Import Management


Step3:

Click On “Import Objects


Step4:

Enter your custom object name ‘PO_REF’. Click on Download button.


Step5:

Open the downloaded .CSV file. Enter the required data field values and save the file.


Step6:

Navigate to the “Import Queue” tab. Click on “Create Import Activity”


Step7:

Enter Name, Description. Select Object Name from LOV. Select .CSV file.


Step8:

Click On Validate Data. Once Validation completed click on the “Close” button.


Step9:

Click on Next. Click on Submit.


Step10:

Click on Hyperlink.


Step11:

It will show the progress of the bulk upload process. Once Process completed 100% Click on Done.


Step12:

Navigate to Custom Object Screen. We can able to check bulk uploaded data available in the custom object main screen.