Subject: Required to send a notification when data Insert/Update on a custom table.
Oracle Alert Drawback: As per the oracle standards, we cannot enable oracle event-based alert on the custom table directly.
Solution:
Step 1: Required to register your custom table into oracle apps.
- Custom table name: MWANI_MARINE_TBL
Table Definition:

- We have required to register custom table using Oracle API
as from Oracle Application, we can not able to register custom table to APPS.
- We have required to register table in Receivable (AR)
application.
PLSQL
Code:
begin
ad_dd.register_table
(p_appl_short_name => 'AR', --Application name in which you want to
register
p_tab_name =>'MWANI_MARINE_TBL', --Table Name
p_tab_type =>'T', -- T for Transaction data , S for seeded
data
p_next_extent =>512,
-- default 512
p_pct_free =>10, -- Default 10
p_pct_used =>70 --Default 70
);
commit;
end;
Step 2: Required to register all custom
table column into oracle apps using Oracle API.
- As in custom table having many columns, We have
designed temp table where I will insert all column configuration as per the
below screenshots, based on that column configuration details we will register
all column using Oracle API.
Temporary
Table Data:
Temp
Table Definition: (Temporary Table Name: XX_TEMP_TBL)
create table XX_TEMP_TBL
(SEQ_NO NUMBER,
COL_NAME VARCHAR2(240),
COL_TYPE VARCHAR2(240),
COL_WIDTH NUMBER,
TABLE_NAME VARCHAR2(240)
);

PLSQL
Code for Oracle API for register Table Column in Oracle Apps:
declare
CURSOR C_MARINE_DTLS
IS
select *from XX_TEMP_TBL where
table_name='MWANI_MARINE_TBL';
begin
begin
mo_global.init ('AR');
mo_global.set_policy_context ('S', 81);
fnd_global.apps_initialize
(fnd_profile.value('user_id'),fnd_profile.value('resp_id')
,fnd_profile.value('resp_appl_id'));
commit;
end;
FOR y IN C_MARINE_DTLS
LOOP
ad_dd.register_column
(p_appl_short_name =>'AR',
p_tab_name
=>'MWANI_MARINE_TBL',
p_col_name
=>trim(y.COL_NAME),
p_col_seq
=>trim(y.SEQ_NO),
p_col_type
=>trim(y.COL_TYPE),
p_col_width
=>trim(y.COL_WIDTH),
p_nullable =>'Y',
p_translate =>'N',
p_precision => null,
p_scale =>null
);
commit;
END LOOP;
end;
Step 3: Once data submitted. Required to
check this table registered in oracle application or not.
-
Navigation: Application Developer > Application > Database >
Table

-
You can query with the table name. You will find all the table configuration.

-
Now table successfully registered with Oracle
Receivable Application.
Step 4: Required to enable event-based oracle alert.
-
Navigation: Alert Manager > Alert > Define

-
Create oracle alert using the registered custom table as
per the requirement.

-
Create action for the event click on Action Button.

-
Click on Action Details.
-
Filled up required details for send notification to
respective person.

-
Save the data.
-
Close the tab.
-
Click on Action Sets. Enter Action Sets name.

-
Click on Action Set Details.
-
Enter the member details.

-
Close the window.
-
Click on Alert Details

-
Go to the Installation tab.
-
Assign Operating Units.

(Note: Required to Assign the Operating Units because
event-based trigger have security profile check restriction)
Step 5: After Event Alert Trigger fire you can check the alert status.
- Navigation: Alert Manager > History.
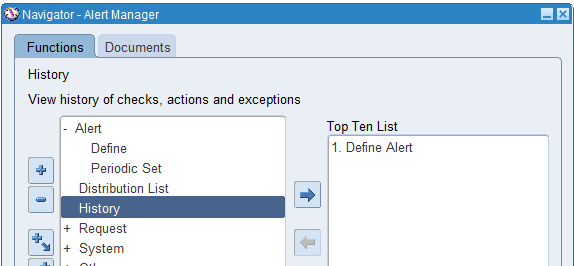
-
You can search by custom oracle alert name.

-
Click on Find Checks.
-
It will give you the history of Alert fire events.

-
It’s showing status: Error because currently, our SMTP server was down.
-
You can check alert message output.
-
Click on Find Actions.

-
Click on Action Log.

-
You can check the notification output.

No comments:
Post a Comment
Note: only a member of this blog may post a comment.